
BY FRAMELIFTER · Updated
The Complete Guide to Real Estate Photography (2026)
Prepare the rooms, choose a useful angle and get the light right before you edit. This guide gives you starting camera settings, a room-by-room shot checklist, and a workflow for reviewing and exporting your listing photos.
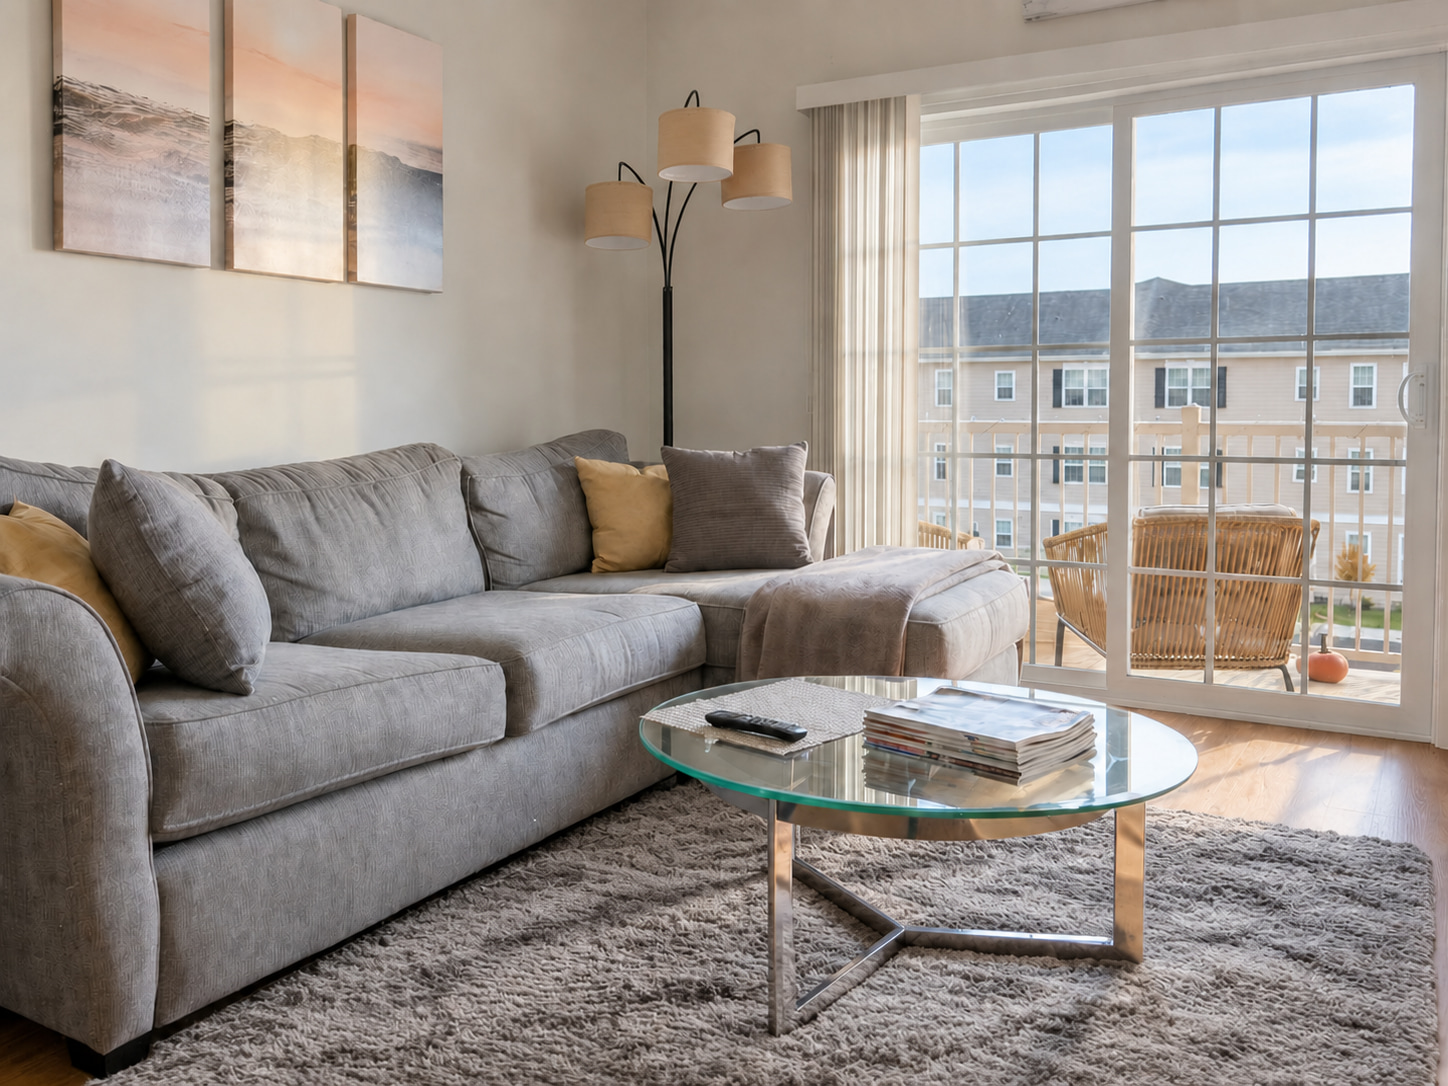
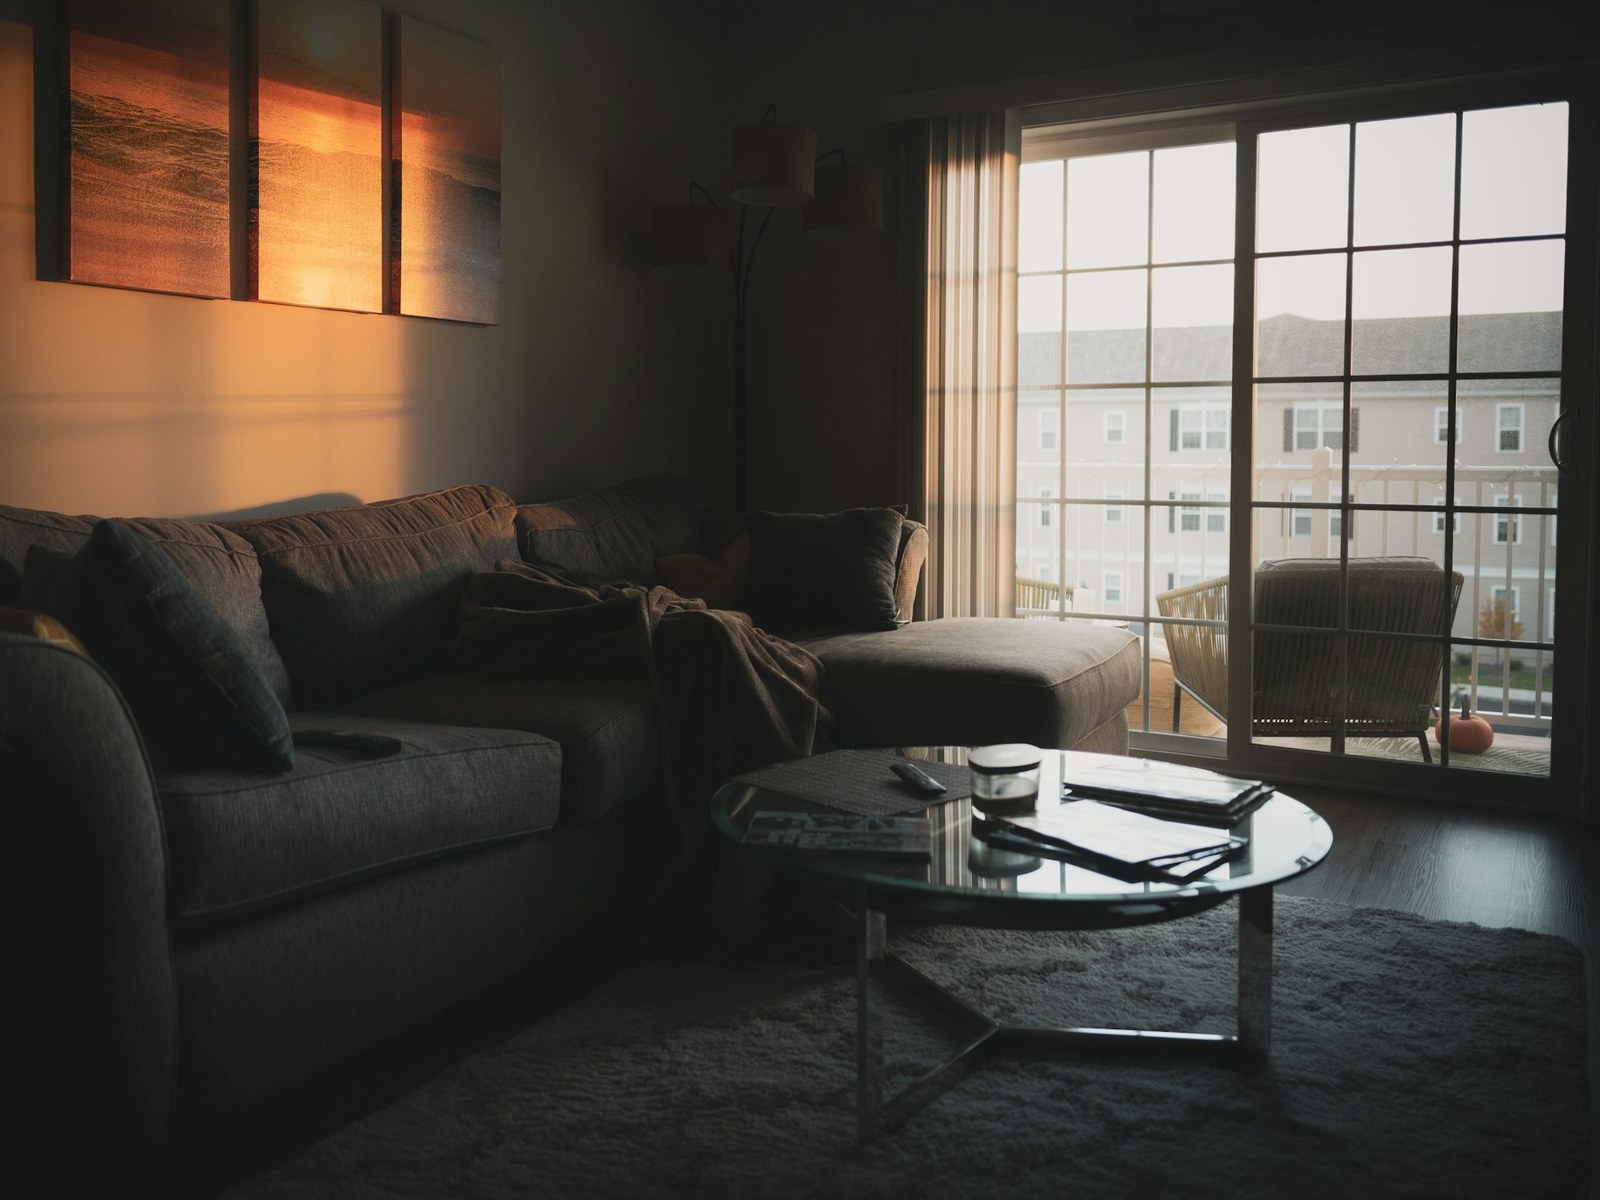
A CLOSER LOOK · FRAMELIFTER
See what a useful edit changes.
Compare the light on the sofa, the wall color, and the detail around the patio doors. This example also includes tidying; a lighting correction and a cleanup are different tasks.
- A brighter room with readable shadows
- Neutral color without washing out the materials
- Review furniture, surfaces and the outside view
Free watermarked enhancement preview. No account or credit card needed.
Jump to a section
Gear: What You Actually Need
You don't need a $3,000 camera body to shoot a listing well, but you do need the right tool for the job you're doing.
Camera vs. phone
A modern smartphone — recent iPhone Pro or a flagship Android — is good enough for most rental listings, especially smaller apartments and single rooms. The wide-angle lens covers a typical bedroom or living room, and built-in HDR modes handle bright windows better than they did a few years ago. See our iPhone real estate photography guide for phone-specific settings and technique.
A dedicated camera gives you more control over lenses, exposure and focus, which can help in difficult light or on a regular shooting schedule. Weigh that flexibility against equipment cost and time spent learning. Try a well-lit phone photo first if you are preparing an occasional listing.
Lens
A rectilinear wide-angle lens around 16–24mm full-frame equivalent is a useful starting point for interiors. Use the longest focal length that still explains the room. Very wide views can stretch furniture near the edges; barrel distortion depends on the lens and can need a lens-profile correction. Keep the camera level and avoid a fisheye lens for a conventional listing photo.
Tripod
Not optional if you're shooting HDR brackets or in low light. A tripod lets shutter speed drop as needed for a clean, low-ISO exposure without introducing camera shake, and it keeps every bracketed frame perfectly aligned for merging. Even for single-shot rooms, a tripod forces you to slow down and check composition before firing, which alone improves most people's photos.
Camera settings: start here, then check the frame
| Control | Starting point | What to check |
|---|---|---|
| Aperture | About f/8 on a dedicated camera | Use the aperture that keeps your room sharp; lens and sensor size matter. |
| ISO | 100–400 when practical | A tripod lets you use a longer exposure instead of raising ISO. |
| Shutter | Meter for the scene; use a tripod for slow exposures | Moving curtains, trees and people may blur even on a tripod. |
| White balance | A consistent setting for the room | Avoid correcting one wall at the expense of another under mixed lighting. |
| Capture | RAW when available; keep the original | Bracket a high-contrast scene when one exposure cannot hold room and window detail. |
| Phone | Grid, level and normal wide camera | Use automatic HDR where available; avoid digital zoom and Portrait mode. |
These are starting points, not a preset for every property. Check a test photo at full size and inspect the brightest window. For exposure brackets, keep focus, framing and aperture fixed while varying shutter speed. See the HDR shooting and editing guide.
Room Prep and Staging Checklist
The best camera settings can't fix a cluttered room. Clear surfaces, clean visible marks and arrange the furniture before choosing an angle. If a room is empty, you can also compare virtual staging before-and-after examples for what furnishing an empty room actually looks like.
- Clear counters — no dish racks, mail piles, or loose cables
- Make beds and straighten pillows; remove excess throw pillows and blankets
- Close toilet lids; remove bath mats with visible wear or stains
- Tuck away trash cans, pet bowls, litter boxes, and pet toys
- Remove personal photos and anything showing a name or address
- Open curtains and blinds fully — bunched fabric at the edge of a window reads as messy
- Straighten rugs and push in chairs
- Hide cleaning supplies, chargers, and remote controls
- Compare daylight alone with room lights on; choose the clearer, more consistent color
- Check for cobwebs and dust on visible surfaces — a wide lens catches everything
It's tempting to skip this when you're shooting a rental turnover on a tight schedule. The tradeoff is real: prep takes time you may not have between tenants. But a cluttered photo reads as a poorly kept unit even when the space itself is fine, and it costs more time to reshoot later than it does to prep now.
Shot list by room
Your room-by-room coverage
0 of 7Use this as a coverage check, not a required photo count. A studio needs fewer distinct frames than a large house. Add room dimensions in the listing where accurate measurements help; a wide lens should not be used to imply extra space.
Composition
Two habits separate amateur real estate photos from professional-looking ones: camera height and straight verticals.
Shoot from chest height
Set the tripod so the camera sits roughly at chest height, around 4.5 to 5 feet off the floor. Lower angles make rooms feel cramped and exaggerate ceiling height oddly; higher angles (shooting down) make rooms look smaller than they are and distort furniture proportions. Chest height approximates how a person actually perceives a room when standing in it.
Two-point perspective
Stand at a corner of the room rather than facing a wall dead-on. Aiming into a corner shows two walls plus the floor and ceiling, which reads as more spacious and gives a much better sense of the room's actual shape than a flat, single-wall shot.
Straighten verticals
Tilting a camera up or down makes vertical lines converge. Door frames and wall corners can appear to lean even when they are straight. Level the camera using a bubble level or your camera's built-in electronic level, and fix any remaining lean with the vertical/lens-correction tools in Lightroom or similar editing software. Leaning walls are one of the fastest tells of an amateur real estate photo.
Find even light before you edit
Look for bright indirect daylight rather than a fixed hour on the clock. Window direction, neighboring buildings, season and weather all matter. Open curtains, take a test frame and compare the room lights on and off. Mixed warm bulbs and blue daylight may need more work than daylight alone.
Keep direct flash off on a phone. If the room is dark, steady the camera and use a longer exposure where possible. If you cannot retain both the room and the view, shoot a bracket or return in softer light instead of relying on software to invent missing detail.
For exteriors, schedule around light on the facade. For a dusk shot, arrive before sunset and photograph as ambient light balances with the existing house lights. See the best-time guide and the twilight before-and-after.
HDR vs. Single Shot
Bracketed HDR — shooting the same frame at 3 to 5 different exposures and merging them — solves a specific problem: a room where the window and the interior are too far apart in brightness for one exposure to capture both. It takes longer to shoot and edit, and it requires a tripod and steady conditions (no moving curtains, fans, or trees outside the window during the sequence). For a full walkthrough of bracket settings and merge technique, see our HDR real estate photography guide .
For rooms without a strong bright-window problem — moderate, even light, no direct sun hitting the glass — a single well-exposed RAW shot is enough, and running it through AI photo enhancement gets exposure, white balance, and clarity corrected in an edit instead of the extra shoot and edit time HDR requires. The honest tradeoff: if the original file has no recoverable detail in a completely clipped window, no amount of single-image editing brings that detail back — you needed brackets captured at shoot time. But for a large share of everyday listings, the difference between a bracketed HDR result and a well-processed single shot is small enough not to matter.
An editing workflow with a review step
- Select: remove blur, duplicates and frames that hide the layout.
- Correct: balance exposure and color, straighten modest tilt, and inspect noise.
- Compare: check doors, windows, surface condition, furniture and outdoor views against the original.
- Separate optional changes: staging and day-to-dusk create different representations and need their own review and any required disclosure.
- Export: keep a full-size master, then create copies for each destination.
In FrameLifter, upload a source photo to see a free watermarked standard enhancement. Compare the light, color and property details against your original. Preview your own photo free.
Exporting for MLS and listing sites
Keep the edited original and make a JPEG copy for delivery. Check your own MLS for dimensions, aspect ratio, file size, color profile, branding and altered-image disclosure rules. There is no single national MLS upload specification.
Resize after editing, inspect the result, and check the live crop after upload. Use our MLS photo resizer with your destination’s requirements. Airbnb and Vrbo have separate photo guidelines.
Frequently asked questions
Do I need a real camera for real estate photography, or is a phone enough?
A modern phone is enough for most rental listings — the wide-angle lens and built-in HDR on recent iPhones and flagship Android phones handle typical rooms well. A dedicated camera still wins for larger homes, tricky lighting, and listings where photo quality matters most, thanks to more control and RAW files that hold up better to editing.
What's the best lens for real estate photography?
A rectilinear wide-angle lens around 16–24mm full-frame equivalent is a useful starting point. Use the longest focal length that explains the room, check stretched objects near the edges, and correct lens distortion where needed.
What camera settings should I use for real estate interiors?
Aperture priority, f/7.1 to f/9, ISO 100-400, a tripod, and RAW files. That combination gets you sharp, low-noise images with enough dynamic range to edit properly afterward.
What time of day is best for real estate photos?
The best time depends on the light reaching the property. Use bright indirect daylight indoors, light on the facade for daytime exteriors, and a changing balance of sky and house lights for twilight. Scout the actual property rather than relying on one fixed time.
Should every room get HDR, or is a single shot enough?
Only rooms with a real bright-window problem need bracketed HDR. Rooms with even light do fine with a single shot plus AI enhancement, which is faster and covers most everyday listings.
What resolution and aspect ratio does the MLS want?
Requirements vary by MLS. Check dimensions, file size, format, branding and disclosure rules with the destination. Keep a full-size original and export a separate upload copy rather than shrinking your only file.