
THE EXTERIOR, IN A DIFFERENT LIGHT
Twilight real estate photos.See the difference.
A blue evening sky. Warm windows. A front door you can picture coming home to. Here’s how to get that look, with a dusk shoot or a photo you already have.
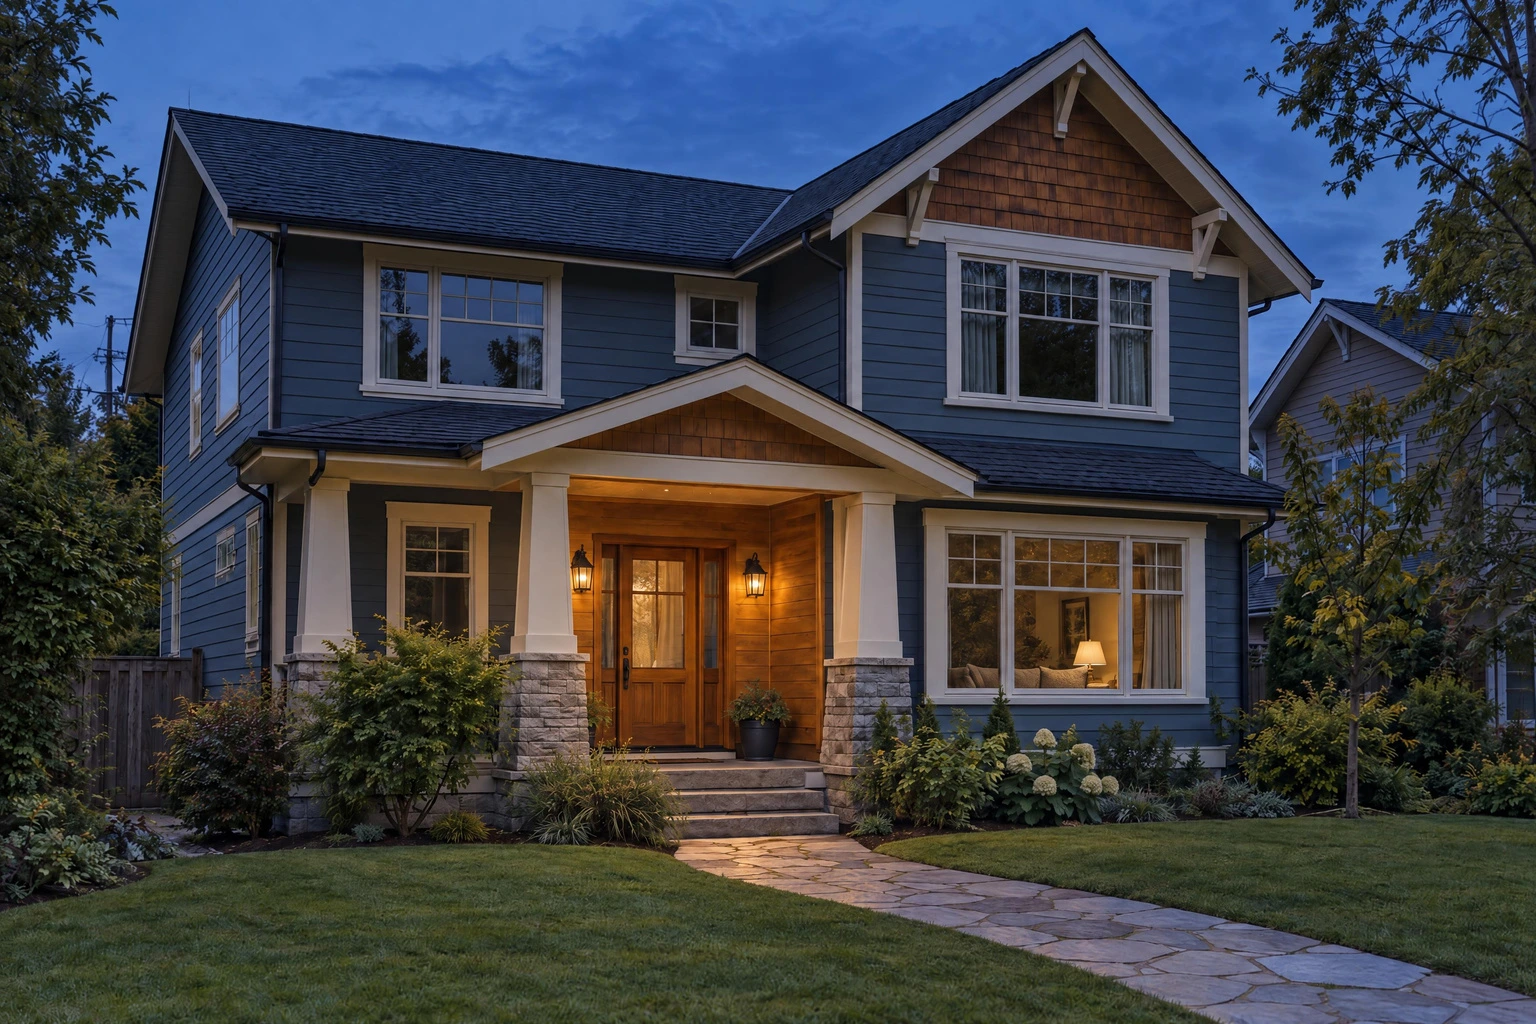
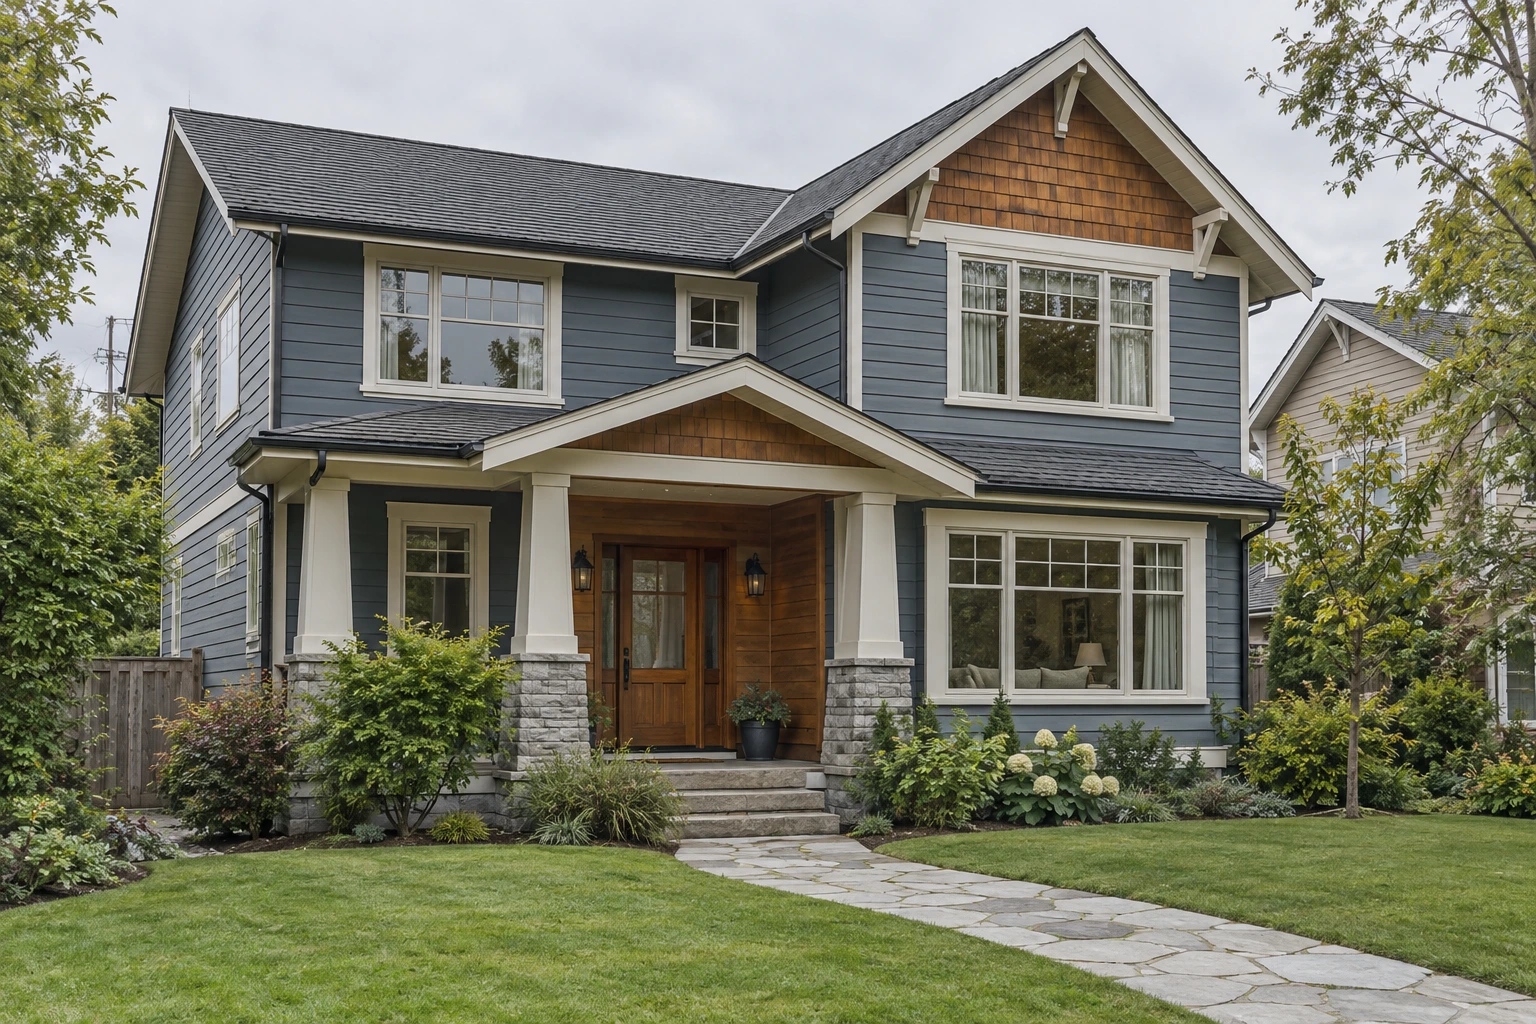
Already have a daytime exterior? FrameLifter’s optional Day to dusk edit creates a simulated evening version. Start by comparing a free enhancement of your photo.
Try my exterior photoFree enhancement preview · Dusk edits available after purchase
READ THE PHOTO
The sky gets your attention.
The house has to hold it.
Use the comparison above to inspect these three things. A dramatic sky alone won’t rescue a weak exterior photo.
Color with room to breathe
Look for a restrained evening tone. Check rooflines, tree branches, and wires for cutout edges or halos.
Warmth, with detail
Light should draw your eye toward the home. Keep frames and curtains readable; solid orange windows can look painted on.
A house you can still see
The porch, siding, and path should remain legible. Compare doors, roof shape, landscaping, and neighboring buildings with the original.
Before you publish: inspect any AI edit at full size. Use dusk for atmosphere; keep clear daytime photos so buyers can see the property’s condition and surroundings.
TWO WAYS TO GET THERE
Plan a dusk shoot.
Or start with your daytime photo.
Shoot the real evening light
Choose this when actual lighting is part of the appeal: a pool at dusk, a terrace view, or carefully designed landscape lighting.
- Schedule access around sunset.
- Turn on the lights you want to show.
- Capture the real sky, reflections, and surroundings.
Edit a daytime exterior
Choose this when you already have a clear exterior and want an evening variation without returning to the property.
- Start with a sharp, unobstructed original.
- Choose Day to dusk in FrameLifter’s paid gallery.
- Review the simulated sky and lighting before keeping it.
Already shot at dusk? Start with standard enhancement to adjust exposure and color. You don’t need to request a change of time of day.
DO IT WITH FRAMELIFTER
From a daytime original
to an evening option.
Day to dusk is a treatment you choose for an exterior. Your first free preview shows standard enhancement; the dusk option unlocks after purchase.
Start with my photo- 1
Upload and preview
Choose your original exterior. Compare the free watermarked enhancement before buying a finished photo or listing.
- 2
Choose “Day to dusk”
In your purchased gallery, open the exterior’s editor. Select Day to dusk and add a specific request if you have one.
“Keep the sky a subtle blue and the window light warm. Keep the house and landscaping the same.”
- 3
Compare, then keep or discard
Review the revision against the previous image. Keep it if it works for your listing; download and retain your original daytime photo too.
IF YOU’RE GOING BACK TO SHOOT
Watch the light,
not a countdown.
Be ready before sunset. Start shooting as the sky dims, then compare frames as indoor lights become more visible. Weather, season, and location change the usable window.
The cue to look for: a colored sky, readable siding, and warm lights in the same frame.
For exposure fundamentals, see Nikon’s dusk and night photography guide.
Before the light changes
- Choose one strong angle that shows the entrance and the home’s shape.
- Move bins and vehicles if possible; tidy the porch and open the view.
- Turn on visible interior and exterior lights. Check for a dark room that breaks the pattern.
- Level the camera on a tripod. Use a timer to avoid movement.
- Take several exposures as the sky changes. Check sharpness and bright windows before leaving.
Camera settings to start with
For a dedicated camera, try RAW, f/8, and a low ISO such as 100–200. Let shutter speed follow the available light. Inspect the result and adjust; these are starting settings, not a fixed recipe.
If windows clip before the facade is bright enough, shoot a bracketed set from the tripod. See our HDR workflow for merging exposures.
On a phone, use the main camera, steady support, and a timer. Inspect for blur and smeared detail. Our iPhone guide covers the controls.
YOUR EXTERIOR IS THE NEXT EXAMPLE
See what FrameLifter
can do with your photo.
Start with a free enhancement preview. If you buy the result, use an included edit to try Day to dusk in your gallery.
No account or credit card needed for the preview. Allow a few minutes. Results depend on the original photo.
Your enhancement preview is free and watermarked. Compare it with your original.
A FEW PRACTICAL DETAILS
Twilight photo questions
When should you take twilight real estate photos?
Set up before sunset and keep shooting as the sky darkens. Look for a balance: the sky still has color, the building is readable, and the interior lights show. Timing varies with location, season, weather, and the direction you face; 20–30 minutes after sunset is not a universal rule.
What’s the difference between twilight and virtual twilight?
A real twilight photo is captured at dusk. Virtual twilight, also called day-to-dusk editing, changes a daytime photo’s sky and lighting to simulate evening. Standard enhancement adjusts exposure and color without intentionally changing the time of day.
Can I try FrameLifter’s twilight editing for free?
The free watermarked preview is a standard photo enhancement. Day to dusk is an optional edit in your purchased gallery and uses one available listing edit. Open an exterior photo, choose Day to dusk, and review the revision before keeping it.
Should the twilight photo be my cover image?
Compare the daytime and dusk versions at thumbnail size. Choose the one that makes the property easiest to understand. Use twilight when it shows the entrance, facade, or outdoor space clearly; keep a daytime exterior in the gallery too. One strong twilight angle is a useful starting point.