You don't need expensive camera equipment to take great rental photos. Your iPhone is more than capable of capturing professional-quality listing images. Here's how to do it right.
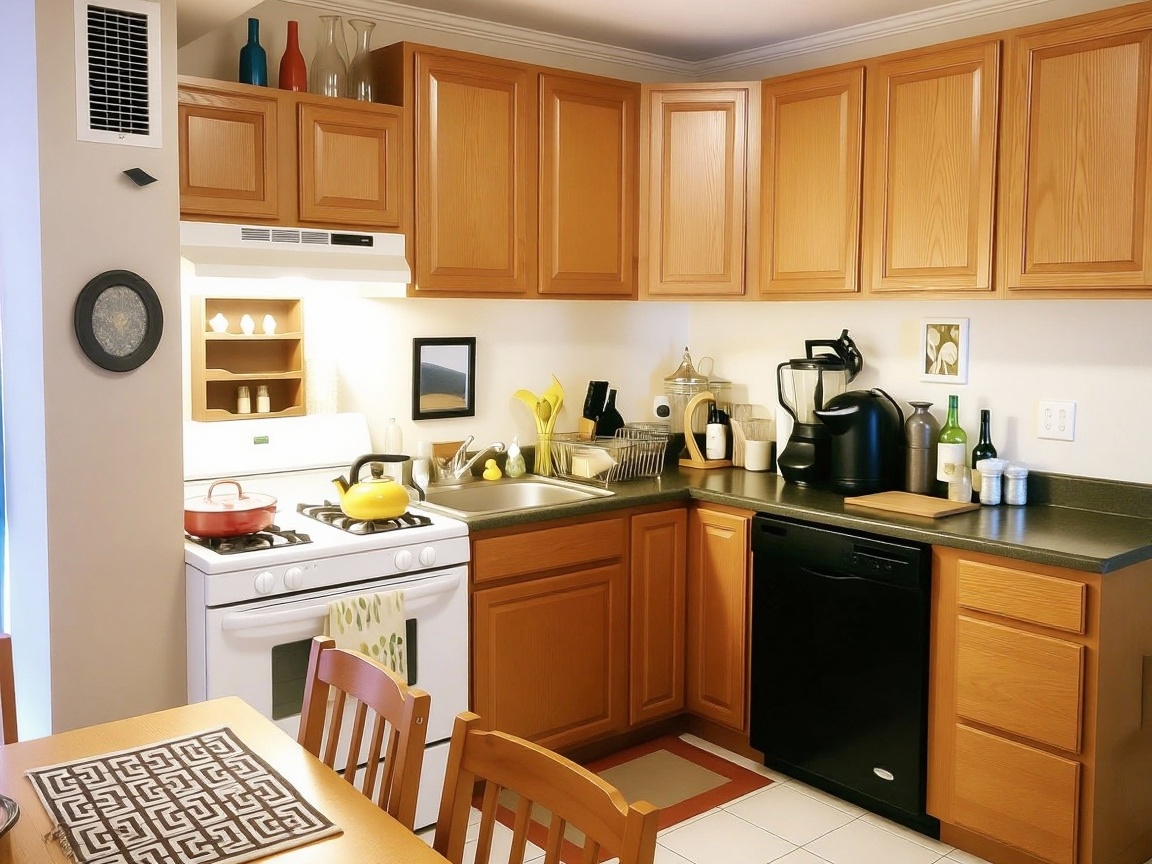
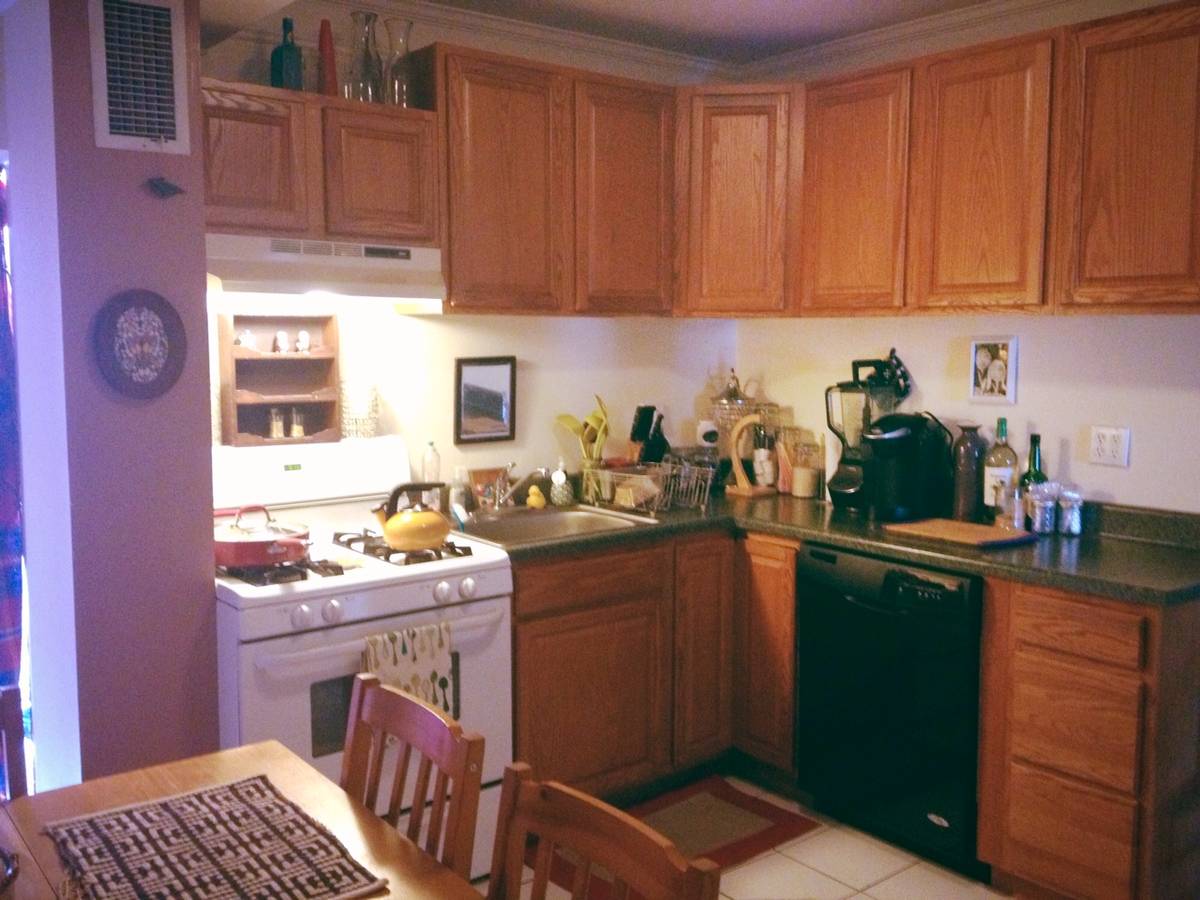
Drag the slider to compare before and after. Real customer photos enhanced with our AI technology.
No credit card required
Modern iPhones have incredibly capable cameras that rival dedicated cameras for real estate photography. The latest models include features specifically designed for this type of work:
Many professional Airbnb hosts and property managers use iPhones exclusively for their listing photos with excellent results.
The ultra-wide lens is your best friend for rental photography. It captures more of the room, making spaces appear larger and more inviting. On most iPhones, tap "0.5x" to switch to this lens.
When to use it: Living rooms, bedrooms, kitchens, bathrooms - almost everywhere
When to avoid: Detail shots, small objects, or when you're very close to a subject (causes distortion)
Go to Settings → Camera → Grid. The grid helps you keep horizontal and vertical lines straight - critical for professional-looking real estate photos. Align walls and doorframes with the grid lines.
Live Photos take up more storage and can reduce image quality. For listing photos, tap the Live Photo icon (the circles) to turn it off. You want the sharpest possible static image.
Go to Settings → Camera → Formats → Most Compatible. This ensures you're capturing full-resolution JPEGs rather than the newer HEIF format, which can cause compatibility issues when uploading to listing platforms.
This is the most important technique. Use the built-in level (visible in the Camera app) to ensure your phone is perfectly horizontal. Tilted photos look amateurish and make rooms feel "off."
Pro tip: Hold your elbows against your body for stability, or use a tripod.
Most professional real estate photos are taken at chest height (about 4-5 feet off the ground). This shows the room naturally without the distorted perspective of shooting too high or too low.
Exception: Bathroom counters and kitchen countertops can be shot from slightly above to show the surfaces clearly.
Shooting from corners captures the maximum amount of the room. Back into corners and aim toward the opposite corner or focal point of the room.
Don't try to capture wall-to-wall. Including partial walls on the edges of the frame gives context and makes the room feel more natural.
Tap on the area you want properly exposed. For interiors, tap on a mid-tone area (not the bright window or dark corner). Slide up or down to adjust exposure after tapping.
Even during the day, turn on every light in the room - overhead fixtures, lamps, under-cabinet lights, everything. This fills in shadows and makes spaces feel warm and inviting.
Maximize natural light by opening all window coverings. The combination of natural light and artificial light creates the best results.
HDR (High Dynamic Range) helps balance the bright light from windows with darker room interiors. On most iPhones, HDR is automatic, but make sure it's not turned off in Settings.
When possible, position yourself so windows are to your side rather than directly in front of you. This reduces the challenge of balancing bright windows with dark interiors.
If clouds are moving across the sun, wait for either full sun or full cloud cover. Inconsistent light makes it hard to get good exposures and creates mismatched photos in your set.
Problem: Flash creates harsh, unflattering light and weird shadows.
Solution: Never use flash for real estate. Rely on natural and artificial room lighting.
Problem: Vertical photos don't work well for listings - rooms need horizontal orientation.
Solution: Always shoot in landscape (horizontal) mode for room photos.
Problem: Standing too close distorts the room and makes it look cramped.
Solution: Back up as far as possible. Use corners to maximize distance.
Problem: Personal items, cords, and clutter distract from the space.
Solution: Spend 5 minutes decluttering each room before shooting.
Problem: Smudges on the lens cause hazy, soft photos.
Solution: Wipe the lens with a microfiber cloth before every shoot.
Problem: You discover issues only when reviewing photos later.
Solution: Take 5-10 shots of each room from different angles. You can always delete extras.
Even great photos can benefit from some post-processing. Here's what to adjust:
If editing each photo individually sounds tedious, AI enhancement services can do all of this automatically. Upload your iPhone photos and get professionally enhanced results in seconds - no editing skills required.
While your iPhone is sufficient on its own, a few inexpensive accessories can improve your results:
Before the shoot:
At each room:
For each shot:
You've taken great photos with your iPhone. Now let AI take them to the next level. Our enhancement service automatically brightens, color-corrects, and sharpens your photos - turning good iPhone shots into professional listing images.
Works with any iPhone photos • Results in 60 seconds