Why Dark Photos Kill Your Bookings
Dark, poorly lit photos are the #1 reason guests skip rental listings. They make spaces look small, dirty, and uninviting - even when your property is actually beautiful and well-maintained.
The Impact of Dark Photos:
- 65% lower click-through rates compared to well-lit photos
- 40% lower conversion rates from views to bookings
- Guests assume poor maintenance and cleanliness
- Reduced perceived value and willingness to pay higher rates
Professional Photography Techniques (Without the Cost)
1. Use Natural Light
The best lighting is free - natural light from windows. Here's how to maximize it:
- Shoot during golden hour (1 hour after sunrise or before sunset)
- Open all curtains and blinds to let in maximum light
- Turn on all lights in the room, including lamps and overhead fixtures
- Use white or light-colored surfaces to bounce light around the room
2. Camera Settings for Better Photos
Even with a smartphone, you can improve your photos significantly:
- Tap to focus on the brightest part of the room
- Adjust exposure by sliding up on the screen after tapping to focus
- Use HDR mode if available to capture more detail in shadows and highlights
- Hold steady or use a tripod to avoid blurry photos
3. Composition Tips
- Shoot at eye level to make rooms feel more spacious
- Include corners and walls to show room dimensions
- Remove clutter and personal items before shooting
- Take multiple angles of each room to find the best lighting
Common Lighting Problems and Solutions
Problem: Harsh Shadows
Solution: Use multiple light sources to fill in shadows. Turn on all available lights and consider using a white sheet or reflector to bounce light into dark corners.
Problem: Yellow or Orange Tint
Solution: This is usually caused by incandescent or warm LED bulbs. Try turning off some lights and relying more on natural light, or use your phone's white balance adjustment.
Problem: Overexposed Windows
Solution: This is common when shooting toward windows. Try shooting from different angles, or use your phone's HDR mode to balance the bright window with the darker room interior.
Problem: Uneven Lighting
Solution: Move around the room and shoot from different positions. The best angle might not be the most obvious one.
AI-Powered Photo Enhancement: The Easy Solution
While these techniques can help, there's an even easier way to get professional results: AI-powered photo enhancement.
What AI Enhancement Does:
- Automatically corrects exposure to brighten dark areas without overexposing bright areas
- Adjusts white balance to remove yellow/orange tints and create natural colors
- Enhances shadows and highlights to reveal detail in both dark and bright areas
- Improves overall clarity and sharpness for a professional look
- Maintains realistic results - no fake or artificial-looking effects
Why AI Enhancement Works Better:
- Consistent results across all your photos
- No photography skills required - just upload and enhance
- Faster than manual editing - process 100 photos in minutes
- Cost-effective - much cheaper than hiring a photographer
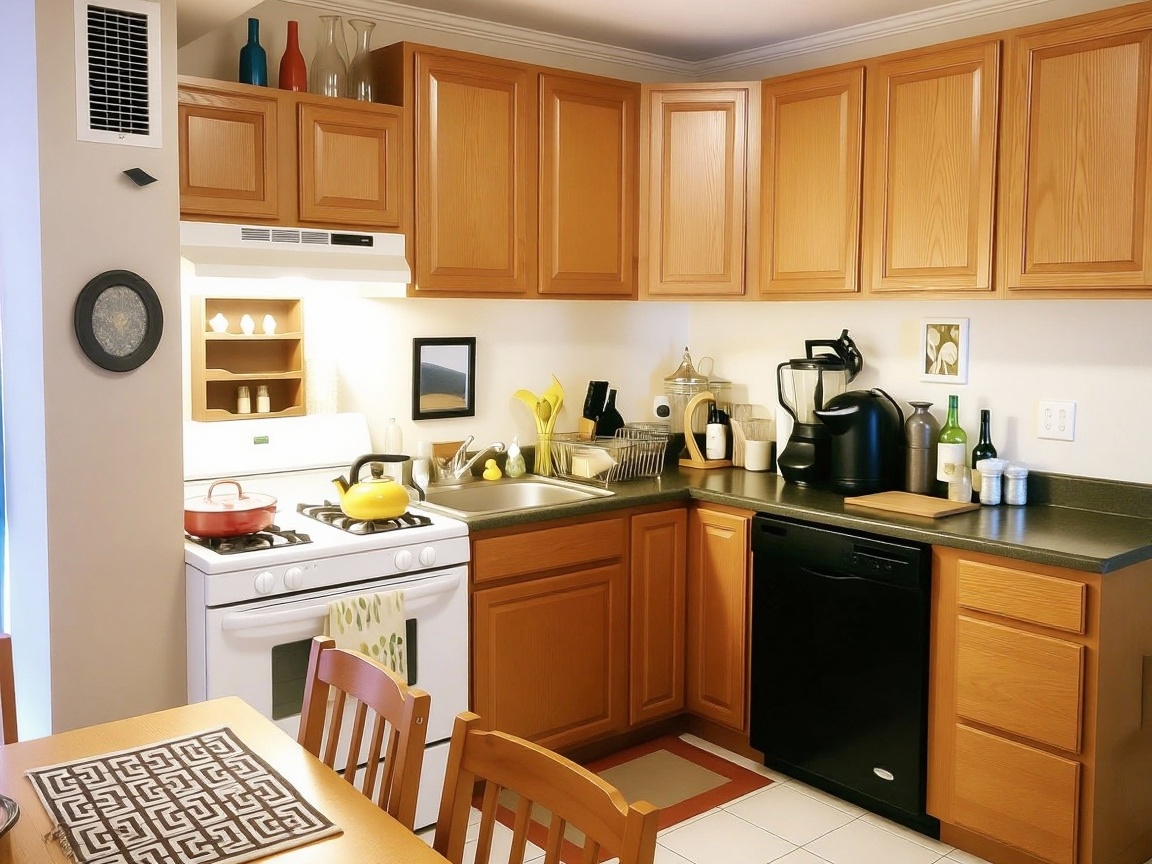
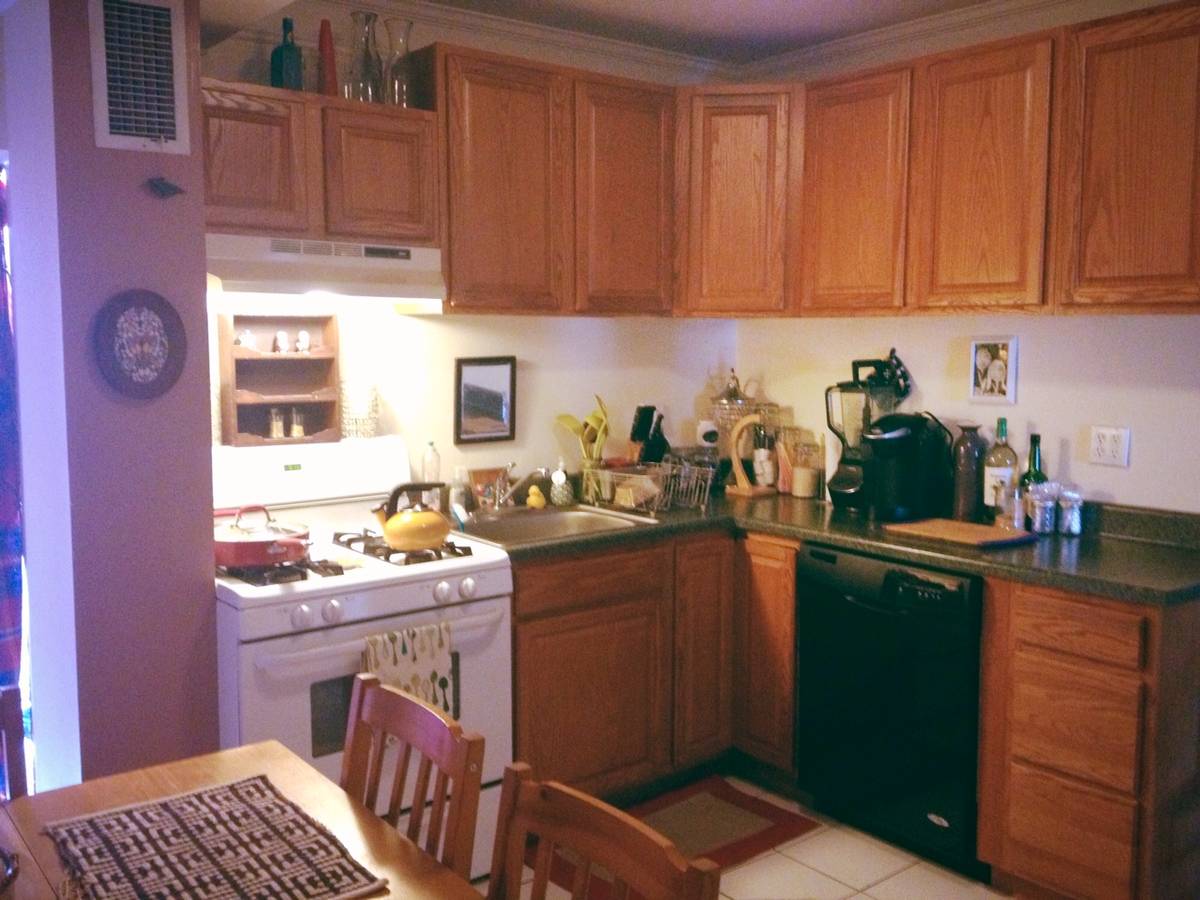
Before and After: Real Examples
Example 1: Dark Basement Apartment
Before: Dark, uninviting basement with poor lighting and yellow tint
After: Bright, welcoming space with natural colors and proper exposure
Result: 40% increase in booking inquiries
Example 2: Overexposed Kitchen
Before: Harsh lighting with blown-out windows and dark shadows
After: Balanced lighting showing both the room and the view outside
Result: 25% increase in click-through rate
Example 3: Yellow-Tinted Living Room
Before: Warm, orange lighting making the room look dated
After: Clean, modern lighting with natural colors
Result: 30% increase in average daily rate
Step-by-Step Guide to Better Photos
Step 1: Prepare Your Space
- Clean and declutter each room
- Open all curtains and blinds
- Turn on all available lights
- Remove personal items and valuables
Step 2: Take Your Photos
- Use the techniques mentioned above
- Take multiple angles of each room
- Include both wide shots and detail shots
- Don't worry about perfect lighting - AI can fix it
Step 3: Enhance with AI
- Upload your photos to our enhancement service
- Let AI automatically improve lighting and colors
- Download your enhanced photos
- Update your listing with the new photos
Common Mistakes to Avoid
1. Over-editing
Don't make your photos look fake or overly processed. The goal is natural, realistic enhancement.
2. Inconsistent Lighting
Make sure all your photos have similar lighting and color tones for a cohesive look.
3. Ignoring Mobile Users
Most guests browse on mobile devices, so make sure your photos look good on small screens.
4. Using Old Photos
Update your photos regularly to reflect your current property condition and decor.
Getting Started Today
Ready to transform your dark rental photos? Here's how to get started:
- Take new photos of your property using the techniques above
- Upload your photos to our AI enhancement service
- Review the results and download your enhanced photos
- Update your listing with the new photos
- Monitor your performance and watch your bookings increase
Try 5 Photos FreeNo credit card required • Instant results
Related Services
Looking for more ways to improve your rental property photos?